How to Make Fresh Tagliatelle by Hand
: invalid url input)
Tagliatelle hail from the Emilia-Romagna and Marche regions of Italy, where they have been loved for generations. Legend states that tagliatelle were invented in 1487 on the night of Annibale II Bentivoglio’s wedding to Lucrezia from the house of Este to mimic her ribbon-like hairstyle. To this day, Bologna takes so much pride in their beloved tagliatelle that they have a solid gold replica, demonstrating the correct dimensions of a piece of tagliatelle: 1 mm x 6 mm.
While your homemade pasta will likely not be those precise dimensions, we can guarantee that if you follow our instructions on how to make tagliatelle, you will arrive at the perfect complement to a hearty and rich beef ragù or a creamy and decadent crema di formaggio. Running short on time? Head over to our weekly menu to enjoy the tagliatelle al ragù or another of our delicious offerings delivered straight to your door and ready in minutes.
A Tip For New Pasta Makers
Our tagliatelle recipe is made with just flour and eggs, so the type of flour you use is very important. When making tagliatelle by hand, always try to use ‘00’ flour, which is available at most major grocery stores, online, or at speciality Italian grocers. Whilst more expensive, the quality of this flour certainly does it justice. Desperate for a pasta fix and can't find 00? You can use all-purpose flour, but your pasta won't be as soft.
How to Make Tagliatelle Pasta - A Recipe
Want to follow along as our sfoglina Roberta makes tagliatelle? Check out the video below:
Serves: 2-3 people
Prep Time: 60 minutes
Cooking Time: 10 minutes
Calories per 100g: 272 kcal
Chef’s Tip: When wondering how to make tagliatelle by hand, don’t think about it too much, give it a go and experience learning how to make pasta.
Ingredients:
- 200g ‘00’ Flour (plus more for work surface)
- 2 large eggs
Chef’s Tip: Pasta is always 1 egg: 100g flour - this amount serves 1-2 people.
Tools:
- Rolling pin
- Fork
- Wooden board
- Pasta cutter or knife
Step 1: Making the Dough
- On a clean marble or wooden work surface, pile your flour into a mound.
- Make a well in the centre of the mound large enough for the 2 eggs.

- Crack the eggs into the well.

- Beat the egg mixture with the fork, slowly pulling the flour from the sides of the well until the egg has all been absorbed by the flour. As the mixture thickens, start using your hands with a scrapper to continue incorporating the flour.
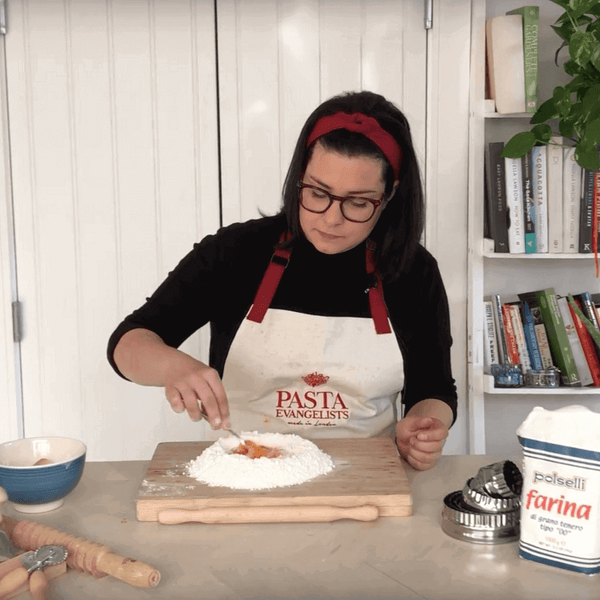
- If needed, drizzle a small amount of warm water and continue mixing until you have a ball of dough.
Step 2: Kneading the Dough
- Clean the work surface of any excess flour or dough bits that never incorporated. Then lightly flour your clean work surface.
- Knead the dough by pressing the heel of one hand into the ball, keeping your fingers high.

- Press down on the dough while pushing it firmly away from you. The dough should stretch and roll under your hand to create a shell-like shape.
- Turn the dough over, then press into the dough with your knuckles, one hand at a time. This process should be carried out around 10 times.
- Roll the dough back into a ball and repeat the stretching and knuckling process, using more flour if needed to prevent any stickiness.
- Repeat the process for about 10-20 minutes until the dough is smooth and silky.
- Roll the dough into a smooth ball.

Step 3: Letting the Dough Rest
- Place the dough in a small bowl and cover with a cloth or plastic wrap.
- Let the dough rest for at least 30 minutes at room temperature, or up to 1 day in the refrigerator.
- If the dough has been refrigerated, let it stand at room temperature for at least 1 hour before rolling and shaping.
Step 4: Rolling the Pasta
- Lightly flour your surface.
- Shape the dough into a rough circle.
- With a rolling pin, begin rolling the dough as you would with a pastry crust, starting in the centre and rolling away from you to the outer edge. You can also use a pasta machine here

- Turn the dough a quarter-turn, and repeat, working your way around, until the sheet of dough is 1/8 inch thin or less. Scatter a small amount of flour on the dough whenever it starts to stick to the surface or the rolling pin.
- According to Italian tradition, the sheet of dough should be transparent enough to read the text beneath.
Step 5: Cutting the Pasta
- Place a dough, now called a sfoglia, onto a clean and lightly floured work surface.

- Roll the dough over itself a few times carefully, ensuring there is enough flour so it doesn't stick. Trim the end edges to be even, then cut into approximately 6mm wide strips.

- Gently lift the pasta strips in the air and place them carefully onto a dishtowel, make sure they are separated.
- Repeat with the remaining sheets of dough.
- At this point, you are ready to cook your pasta. If you made too much, you can always freeze your pasta for up to a month. Read all about taking care of your pasta creations in our ultimate guide to storing fresh pasta.
Step 6: Cooking the Tagliatelle
- Now that you have succeeded in making incredible, fresh tagliatelle, you're ready to combine with your sauce of choice!
- Bring a large pot of water to a boil. Once boiling, add a generous amount of salt.
- Add the pasta and cook for 3-4 minutes, or until al dente (taste a piece before removing from the water).
- Strain the pasta and mix with sauce. Shave some Parmigiano Reggiano on top and enjoy!
Chef’s Tip: Save ¼-cup of the pasta water to add to your sauce. The starch and salt in the pasta water adds flavour and helps thicken the sauce.
Now you know how to make tagliatelle pasta, you're on your way to becoming a pastaia! Share your creations with us, tagging #pastaevangelists on Instagram.
At Pasta Evangelists, we bring a taste of Italy to your kitchen. Prepared using the freshest ingredients, our gourmet pasta dishes are perfect for those looking to enjoy restaurant-quality meals, delivered to your door, and ready in under five minutes. Order from our weekly menu today, and we’ll offer you 25% off your first delivery - simply enter the code BLOG25 at checkout.


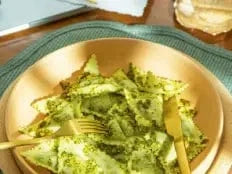


I can’t believe it! From my my very unbelievable level of zero I followed these instructions and finished up with an amazing yummy plate of pasta. Pasta Saturday has now become our favourite lockdown food on weekends where the whole family have great fun making and/or inventing our PS (Pasta Saturday). Even our youngest daughter aged 6 and whose coincidentally initials are PS has invented her own PS recipe – a surprisingly exciting combination of herbs from the garden ( rosemary, mint, parsley and sage) which we chop and add to melted butter. We’ve enjoyed Pasta Evangelists’ delivered to our home throughout lockdown and through them had fun inventing our own pasta sauces. I think our ‘ new normal’ will always include your and our own very special pasta dishes and hopefully a holiday in Italy next summer!